Introduction
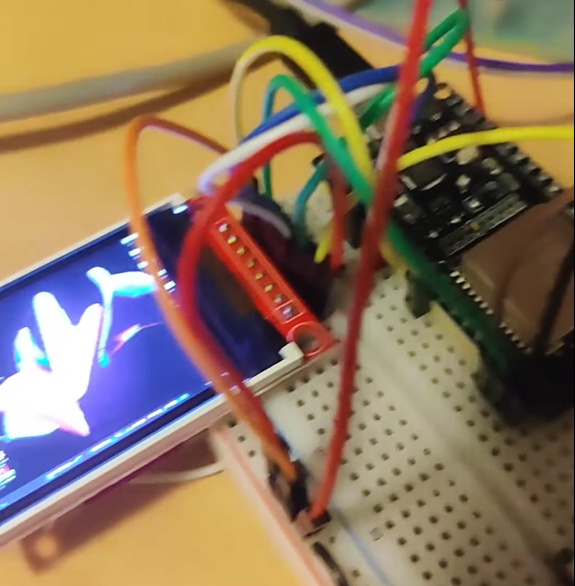
In this project, I demonstrate how to wirelessly stream a computer screen onto a tiny display using the ESP32. The system captures the screen, resizes it, and transmits it over Wi-Fi to an ESP32, which then displays the image on a small TFT screen.
Hardware Used
- ESP 32
- TFT Display
- Basic electronic components (jumper wires, soldering iron, breadboard, micro usb cable)
Software Used
- Python script for screen capturing and resizing
- Arduino code running on ESP32 for display handling
- Web sockets for real-time communication
Python Script: Screen Capturing
The Python script performs several key tasks:
- Captures the Screenshot using libraries like PIL and mss.
- Resizes the Image to 160x128 and converts it to 16-bit RGB565 format.
- Sends the Image to the ESP32 server via a web socket.
ScreenshotSavePath = r"PATH/TO/SAVE/SCREENSHOT.png"
ResizedSavePath = r"PATHTO/SAVE/RESIZEDSCREENSHOT.png"
BufferSize = 160*128*2 #change according to the size of the display

#positions of the window to be captured
startX = 0
startY = 0
width = 1024
height = 768

#Imports
import queue
from PIL import ImageGrab
import threading
from PIL import Image
from mss import mss
import time
import pyautogui
import cv2
import numpy as np
import websocket
mon = {'left': startX, 'top': startY, 'width': width, 'height': height}
img = cv2.imread(ScreenshotSavePath, cv2.IMREAD_UNCHANGED)

q1 = queue.Queue(maxsize=50)       #store the scrrenshot data
q2 = queue.Queue(maxsize=50)       #store the display data

def convert(x):
    ''' convert 16 bit int x into two 8 bit ints, coarse and fine.
    '''
    c = (x >> 8) & 0xff # The value of x shifted 8 bits to the right, creating coarse.
    f = x & 0xff # The remainder of x / 256, creating fine.
    return c, f

def getScreenshot(q1):
    #1. Get screenshot of current window.
    timestart = time.time()
    with mss() as sct:
        imgnp = sct.grab(mon)
        imgnp = Image.frombytes('RGB', (imgnp.width, imgnp.height), imgnp.rgb)
    img = cv2.resize(np.array(imgnp), (160, 128), interpolation = cv2.INTER_AREA)
    timeend = time.time()
    q1.put(img)


def getimage(q1, q2):
    ''' Get screenshot of current window.
    Deals with Task 2. of the plan of action.
    Get the screenshot, resize it, and save it to a file.
    Then converts the image color data, and returns a bitmap of the image.
    '''
    #2. Resize it to 160x128 and 16bit RGB565.
    timestart = time.time()
    resizedimg = q1.get()

    R5 = (resizedimg[...,0]>>3).astype(np.uint16) << 11
    G6 = (resizedimg[...,1]>>2).astype(np.uint16) << 5
    B5 = (resizedimg[...,2]>>3).astype(np.uint16)

    RGB565 = B5 | G6 | R5
    imageData = RGB565.flatten()
    Eight_BitData = []
    for x in imageData:
        upper8, lower8 = convert(x)
        Eight_BitData.append(upper8)
        Eight_BitData.append(lower8)
    #return Eight_BitData
    timeend = time.time()
    q2.put(Eight_BitData)
    print("elements in Q1: ",q1.qsize())
    print("elements in Q2: ",q2.qsize())


def SendData(data, ws, q2):
    timestart = time.time()
    ''' Send data to ESP32 Server via WEB Socket.
        input: The data needed to be sent
    '''
    #3. Send it to ESP32 Server via WEB Socket.
    ws.send("1") #header
    ws.send_binary(data[0:10240])
    ws.send_binary(data[10240:20481])
    ws.send_binary(data[20481:30721])
    ws.send_binary(data[30721:40960])
    ws.send("0") #footer
    timeend = time.time()

#####-------------------THREADS-----------------------#####
def ScreenshotThread():
    ''' Thread for getting screenshots. fills up queue q1.
    '''
    #time.sleep(1)
    print("Screenshot Thread Started")
    desiredfps = 15
    while True:
        timestart = time.time()
        getScreenshot(q1)
        timeend = time.time()
        fpsdelay = 1.0/desiredfps - (timeend-timestart)
        if fpsdelay > 0:
            time.sleep(fpsdelay)

def ImageprocessThread():
    """
    Keep processing the images obtained from screenshot thread.
    """
    print("waiting for screnshot thread to fill the buffer")
    waittime = 4.0
    time.sleep(waittime)
    print("ImageprocessThread started")
    while True:
        getimage(q1, q2)


def SendDataThread():
    ''' Thread for sending data.
    '''
    #start and setup websocket connection
    ws = websocket.WebSocket()
    #ws.connect("ws://" + "192.168.4.1" + ":81/")
    ws.connect("ws://" + "192.168.171.30" + ":81/")
    print("3 second cooldown")
    time.sleep(13.0)
    #once that is done, we can continously keep getting screenshots and keep sending them to the ESP32 Server.
    print("Display should start now")
    fpscounter = 0
    timestart = time.time()
    desiredfps = 60.0
    while True:
        SendData(q2.get(), ws, q2)
        fpscounter += 1
        if (fpscounter % 30 == 0):
            timeend = time.time()
            print("FPS: ", 30/(timeend - timestart))
            timestart = timeend
        time.sleep(1/desiredfps)
        #time.sleep(0.01)


def main():
    ''' Main function.
    '''
    print("Program Started")
    #start threads
    thread1 = threading.Thread(target=ScreenshotThread)
    thread2 = threading.Thread(target=SendDataThread)
    thread3 = threading.Thread(target=ImageprocessThread)
    thread1.start()
    thread2.start()
    thread3.start()
    #wait for threads to finish
    #this should never happen
    thread1.join()
    thread2.join()
    thread3.join()
    print("Program stopped")
if __name__ == '__main__':
    main()
Note:
Note: I am not a Computer Science Student and so I haven’t taken courses on networks, OS or concurrency. I try to learn these on my own and so I am not sure if the code above is the best way to do it. If you have any suggestions or feedback, please feel free to leave them in the comments section below.
Explanation of the Python Script
The script should be pretty explantory with the comments. On a higher level, the script does the following:
- Captures the screen using the mss library.
- Resizes the image to 160x128 and converts it to 16-bit RGB565 format.
- Sends the image to the ESP32 server via a web socket.
There are three threads running in the script which take screenshot, convert and send the data respectively. If you have any questions or feedback, please feel free to leave them in the comments section below.
ESP32 Code: Display Handling
The C++ code running on the ESP32 performs the following tasks:
- Sets up the TFT display.
- Sets up the web socket server.
- Receives the image data from the Python script.
- Displays the image on the TFT display.
main.cpp
//Libraries:
//For server communication
#include <WiFi.h>
#include <WebServer.h>
#include <ArduinoJson.h>
#include <WebSocketsServer.h>
#include <TFT_eSPI.h> // Graphics and font library for ST7735 driver chip
#include <SPI.h>
//This file has the Webpage
#include "index.h"
#include <string.h>

TFT_eSPI tft = TFT_eSPI();
void TFTSetup();

//Wifi credentials : Aim is to make a WiFiStation on ESP.
//These are used when we setup Soft AP mode WiFi
const char* ssidAP = "WindowsStreamer";
const char* passwordAP = "eightcharlong";
// WIFI IP: 192.168.160.20    //might need to change this
//these are my phone's wifi credentials not needed if they are commented
// These are used when we use Station mode WiFi
const char* ssid = "SSID";
const char* password = "PAssword";

//Display Stuff
#define DISPLAY_BUFFER_SIZE 20480 // 160x128 = 20480
#define DISPLAY_WIDTH 160
#define DISPLAY_HEIGHT 128
#define StartX 0
#define StartY 0
#define FPSdesired 10                                   //Desired FPS for the display(max 30)
#define FPSDelayMS 1/(FPSdesired*1.0)*1000              //The time we have to wait for between each new frame

uint16_t DisplayBuffer[DISPLAY_BUFFER_SIZE];
uint8_t DisplayPreBuffer[DISPLAY_BUFFER_SIZE*2];
void fillDisplayBuffer(uint8_t *payload, uint16_t length);
void fillDisplayPreBuffer(uint8_t *payload, size_t length);
bool DisplayBufferReady = false;
uint16_t Current_BUFFER_Pos = 0;
uint16_t fpscounter = 0;
unsigned long timestart = 0;
const int FPSDelay = ceil(FPSDelayMS);                  //The Delay in Milliseconds between each new frame.

//For the Webserver stuff
#define soft_AP 0 //if this is 1 then the ESP will be a soft AP otherwise it will be a station
String jsonString; //String to hold the JSON data
WebServer server(80); //Webserver object
WebSocketsServer webSocket = WebSocketsServer(81); //Websocket object


//This function is called when a client connects to the websocket
void webSocketEvent(byte num, WStype_t type, uint8_t * payload, size_t length){
  //Serial.printf("WebSocket %d received event: %d\n", num, type);
  switch (type) {
    case WStype_DISCONNECTED:
      Serial.printf("WebSocket %d disconnected\n", num);
      break;
    case WStype_CONNECTED:
      {
        IPAddress ip = webSocket.remoteIP(num);
        Serial.printf("WebSocket %d connected from %d.%d.%d.%d url: %s\n", num, ip[0], ip[1], ip[2], ip[3], payload);
      }
      break;
    case WStype_TEXT:   //I have added a header and footer to the data so that we can differentiate between the start and end of the data
      //Serial.printf("WebSocket %d received text: %d\n", num, *payload);
      if(*payload == 49){   //49 is the ASCII value for 1
        //Serial.println("Start");
      }
      if(*payload == 48){  //48 is the ASCII value for 0
        //Serial.printf("Finish. %d\n",Current_BUFFER_Pos);
        Current_BUFFER_Pos = 0;
        fillDisplayBuffer(DisplayPreBuffer, DISPLAY_BUFFER_SIZE*2);
        DisplayBufferReady = true;
      }
      break;
    case WStype_BIN:    //If we get binary data which is our image then do these things
      //Serial.printf("WebSocket %d received binary length: %u\n", num, length);
      //Fill the received data into our DisplayBuffer
      //but the data is 8bit, buffer is 16bit so we need to do some conversion
      fillDisplayPreBuffer(payload, length);
      break;
    case WStype_ERROR:
      Serial.printf("WebSocket %d error\n", num);
      break;
    case WStype_FRAGMENT:
      Serial.printf("WebSocket %d fragment\n", num);
      break;
    default:
      Serial.printf("WebSocket %d unknown type\n", num);
      break;
  }
}

//Setup function
void setup(void) {
  //start serial communication
  Serial.begin(115200);
  while (!Serial)
    delay(10);

  //connect to WiFi, check which connection type is wanted
  if(soft_AP == 1){
    //Setup soft AP
    WiFi.softAP(ssidAP, passwordAP);
    IPAddress myIP = WiFi.softAPIP();
    Serial.print("IP address: ");
    Serial.println(myIP);
    delay(5000);
  }
  else{
    //Setup Station
    WiFi.begin(ssid, password);
    while (WiFi.status() != WL_CONNECTED) {
      delay(500);
      Serial.print(".");
    }
  Serial.println("");
  Serial.print("Connected to WiFi network with IP Address: ");
  Serial.println(WiFi.localIP());
  delay(5000);
  }

  //Setup the TFT Screen
  TFTSetup();

  // Start the server, when new client connects, we send the index.html page.
  server.on("/", [](){
    server.send(200, "text/html", index_html);
  });

  server.begin(); //intialize the server
  webSocket.begin();  // intialze the websocket server
  webSocket.onEvent(webSocketEvent);  // on a WS event, call webSocketEvent
  Serial.println("Setup Done");
  delay(2500);
  timestart = micros();
}

void loop() {

  // Handle all the server BS
  server.handleClient(); // Listen for incoming clients
  webSocket.loop(); // Listen for incoming websocket clients

  //If the DisplayBuffer is ready then draw the buffer to the screen
  if(DisplayBufferReady == true){
    //We have a new buffer to display so do it
    tft.pushImage(StartX, StartY, DISPLAY_WIDTH, DISPLAY_HEIGHT, DisplayBuffer);
    DisplayBufferReady = false;
    fpscounter++;
    if(fpscounter > 100){
      float timetaken = ((micros()*1.0 - timestart*1.0)/1000000.0);
      Serial.printf("Printed %d frames in %lf seconds, framerate: %lf\n", fpscounter, timetaken, (fpscounter*1.0/timetaken));
      timestart = micros();
      fpscounter = 0;
    }
  }
  //Serial.println("Waiting for image");
  //delay(FPSDelay);
}

void TFTSetup(){
  tft.init();
  tft.setRotation(1);
  tft.fillScreen(TFT_BLACK);
  tft.setSwapBytes(true);
}

void fillDisplayPreBuffer(uint8_t *payload, size_t length){
  int j = Current_BUFFER_Pos;
  //Serial.printf("BufferPosition at Start of filling: %d\n", j);
  for(int i = 0; i < length; i++){
    DisplayPreBuffer[j] = payload[i];
    j++;
  }
  Current_BUFFER_Pos = j;
  //Serial.printf("BufferPosition at End of filling: %d\n", j);
}

void fillDisplayBuffer(uint8_t *payload, uint16_t length){
  int j = 0;
  for(int i = 0; i < length-1; i+=2){
    DisplayBuffer[j] = ((payload[i] << 8) | (payload[i+1] & 0xff));
    j++;
  }
}
Here is the index.h file that is included in the code above. This file contains the HTML code for the webpage that is displayed when the ESP32 is connected to a computer. The webpage displays the current X and Y angles of the IMU. (Not used in this project).
index.h
//HTML Index Page for the controller server
const char index_html[] PROGMEM = R"rawliteral(
<!DOCTYPE HTML><html>
<head>
  <meta name="viewport" content="width=device-width, initial-scale=1">
  <title>ESP Web Server Remote</title>
  <style>
    body {
        background-color: #f0f0f0;
        text-align: center;
        font-family: Arial, Helvetica, sans-serif;
    }
  </style>
</head>
<body>
    <h1>ESP Web Server Remote</h1>
    <h2>X-Axis Angle: <span id='Xaxis'>-</span></h2>
    <h2>Y-Axis Angle: <span id='Yaxis'>-</span></h2>
<script>
  var Socket;
  function init() {
    Socket = new WebSocket("ws://" + window.location.hostname + ":81/");
    Socket.onmessage = function(event) {
      console.log("Connected to server");
      processData(event);
    };
  }
  function processData(event) {
      var data = JSON.parse(event.data);
      console.log(data);
      document.getElementById('Xaxis').innerHTML = data.Xangle;
      document.getElementById('Yaxis').innerHTML = data.Yangle;
  }
  window.onload = function(event) {
    init();
  }
</script>
</body>
</html>
)rawliteral";
Explanation of the ESP32 Code
The ESP32 code is pretty self explanatory with the comments. The Web Server is used to serve the webpage to the client. The web socket server is used to receive the image data from the Python script. We check for Header and Footer to organize the data. The image data is stored in a buffer and then displayed on the TFT display. If you have any questions or feedback, please feel free to leave them in the comments section below.
YouTube Video
You can find the YouTube video for this project embedded below or click here to view it directly.
Future Work
- The major work needed is to imporve the frame rate. Sending raw binary image data is too long and thus slows down the FPS. In future I am planning to compress the image before sending it to the ESP32. The decompression will add some overhead processingt time on the ESP but we can utilize the ESP32’s dual core to do this.