Introduction
This project is a continuation of a past project done by me. That can be found Here. This project aims to further imporve the FPS and decrease the Latency in getting the video data from the computer. I tried three different approaches to stream my screen. Keep reading to find out which one worked the best.
Hardware Used
- ESP 32
- TFT Display
- Basic electronic components (jumper wires, soldering iron, breadboard, micro usb cable)
Software Used
- Python script for screen capturing and resizing
- Arduino code running on ESP32 for display handling
- Libraries used:
- Python: mss, PIL, numpy, cv2, websocket
- Arduino: TFT_eSPI, SPI, WiFi, WebServer, ArduinoJson, WebSocketsServer, JPEGDecoder, WiFI UDP
The project GitHub repository can be found here
Python Script: Screen Capturing
I completly revamped the python script for this well not completely but I got rid of the thread and the queues, they added delay. I tried three different approaches to stream my screen.
- Using Websockets to send the data in bitmap format.
- Using Websockets to send the data but image is compressed in JPEG.
- Using UDP to send the data in bitmap format.
Now to keep the blog post small and consise I wont add the code for all three approaches but feel free to go to the project GitHub page to check out the code for all three approaches.
Approach 1: Websockets + Bitmap
The complete script is given below. The script is pretty self explanatory with the comments. On a higher level, the script does the following:
- Captures the screen using the mss library.
- Resizes the image to 160x128 and converts it to 16-bit RGB565 format.
- Sends the image to the ESP32 server via a web socket. There is a upper limit on maximum packet size for one transaction, so I split the image into smaller chunks and sent them one by one. This adds up send time (which is the main limiting factor for FPS) but it can provide stable 12-15 FPS.
import numpy as np
import cv2
from mss import mss
from PIL import Image
import time
import websocket

def convert(x):
    ''' convert 16 bit int x into two 8 bit ints, coarse and fine.
    '''
    c = (x >> 8) & 0xff # The value of x shifted 8 bits to the right, creating coarse.
    f = x & 0xff # The remainder of x / 256, creating fine.
    return c, f

def SendData(data, ws):
    ''' Send data to ESP32 Server via WEB Socket.
        input: The data needed to be sent
    '''
    #3. Send it to ESP32 Server via WEB Socket.
    chunk_size = 10500
    ws.send("1")
    for i in range(0, len(data), chunk_size):
        ws.send_binary(data[i:i+chunk_size])
    # print("Bytes Sent: ", len(jpeg_image_bytes))
    ws.send("0")

bounding_box = {'top': 0, 'left': 0, 'width':1920, 'height': 1080}

sct = mss()
frame  = 0
time_start = time.time()
ws = websocket.WebSocket()
ws.connect("ws://" + "192.168.1.3" + ":81/")

while True:
    time_process = time.time()
    #get frame
    sct_img = sct.grab(bounding_box)
    timenow = time.time()
    frame += 1

    #process Frame
    img = cv2.resize(np.array(sct_img), (160, 128), interpolation = cv2.INTER_AREA)
    img = cv2.cvtColor(np.array(img), cv2.COLOR_BGR2RGB)
    # RGB565 = cv2.cvtColor(img, cv2.COLOR_BGR2BGR565)
    print("Time to Process frame: ", (time.time()-time_process)*1000, "ms")

    time_process = time.time()
    resizedimg = img.astype(np.uint16)
    B5 = (resizedimg[...,0]>>3).astype(np.uint16) << 11
    G6 = (resizedimg[...,1]>>2).astype(np.uint16) << 5
    R5 = (resizedimg[...,2]>>3).astype(np.uint16)
    RGB565 = R5 | G6 | B5

    RGB565_flat = RGB565.flatten()
    # RGB565_flat = RGB565.flatten().astype(np.uint16)

    Eight_BitData = np.zeros(RGB565_flat.size * 2, dtype=np.uint8)
    Eight_BitData[::2] = RGB565_flat >> 8  # Upper 8 bits
    Eight_BitData[1::2] = RGB565_flat & 0xFF  # Lower 8 bits

    print("Time to Convert frame: ", (time.time()-time_process)*1000, "ms")


    time_process = time.time()
    #Send Data
    SendData(Eight_BitData, ws)
    print("Time to Send frame: ", (time.time()-time_process)*1000, "ms")


    cv2.imshow('screen',img)
    if frame > 100:
        print("FPS: ", frame/(timenow-time_start))
        frame = 0
        time_start = time.time()

    if (cv2.waitKey(1) & 0xFF) == ord('q'):
        cv2.destroyAllWindows()
        break
Approach 2: Websockets + JPEG
I am not adding the complete script but will add small snippets. The main structure is similar. As you can see the image is just resized and no further processing is done afterwards
while True:
    #get frame
    sct_img = sct.grab(bounding_box)
    timenow = time.time()
    frame += 1

    #process Frame
    img = cv2.resize(np.array(sct_img), (160, 128), interpolation = cv2.INTER_AREA)

    #Send Data
    SendData(img, ws)


    cv2.imshow('screen',img)
    if frame > 100:
        print("FPS: ", frame/(timenow-time_start))
        frame = 0
        time_start = time.time()

    if (cv2.waitKey(1) & 0xFF) == ord('q'):
        cv2.destroyAllWindows()
        break
and at the sending part we convert the image to JPEG and then send it
def SendData(data, ws):
    ''' Send data to ESP32 Server via WEB Socket.
        input: The data needed to be sent
    '''
    # Set JPEG compression quality to 90
    jpeg_quality = 65
    encode_params = [int(cv2.IMWRITE_JPEG_QUALITY), jpeg_quality]

    # Convert the 24-bit BGR image to JPEG with the specified quality
    _, jpeg_image = cv2.imencode('.jpg', data, params=encode_params)
    jpeg_image_bytes = jpeg_image.tobytes()
     # Save the JPEG image to a file
    with open('output.jpg', 'wb') as file:
        file.write(jpeg_image_bytes)
    #3. Send it to ESP32 Server via WEB Socket.
    ws.send("1")
    if len(jpeg_image_bytes) > 10240:
        start = 0
        while start < len(jpeg_image_bytes):
            ws.send_binary(jpeg_image_bytes[start:start+10240])
            start += 10240
    else:
        ws.send_binary(jpeg_image_bytes)
    print("Bytes Sent: ", len(jpeg_image_bytes))
    ws.send("0")
Approach 3: UDP + Bitmap
This was a major change, as UDP had a different way of sending data. I used the following code to send the data:
"""
Send Data Function

Sends the binary data with a header and footer to the ESP32.
Data is sent in chunks.
"""
def sendUDP(data, sock):
    # Send the header
    sock.sendto(Header, (UDP_IP_ADDRESS, UDP_PORT))
    # Send the data in chunks
    for i in range(0, len(data), UDP_SEDNING_SIZE):
        sock.sendto(data[i:i+UDP_SEDNING_SIZE], (UDP_IP_ADDRESS, UDP_PORT))
        time.sleep(0.0001)
    # Send the footer
    sock.sendto(Footer, (UDP_IP_ADDRESS, UDP_PORT))

def CreateUDPSocket():
    # Create a UDP socket
    sock = socket.socket(socket.AF_INET, socket.SOCK_DGRAM)

    # Bind the socket to a specific address and port (optional)
    sock.bind(("", 0))  # Bind to any available local address and port

    print("UDP Socket created and bound to address: ", sock.getsockname())
    return sock
I added a header and footer to the data to help organize udp packets.
# ESP32 (or other device) IP and port
UDP_IP_ADDRESS = "192.168.1.3"  # Replace with your ESP32's IP address
UDP_PORT = 1234                # Replace with your chosen port number

#UDP transmission stuff
UDP_SEDNING_SIZE = 1460
Header = [0x00]
Header = np.array(Header, dtype=np.uint8)
Footer = [0xFF]
Footer = np.array(Footer, dtype=np.uint8)
And the call to send was the same as before:
#send frame
sendUDP(Eight_BitData, sock)
Note:
Note: I am not a Computer Science Student and so I haven’t taken courses on networks, OS or concurrency. I try to learn these on my own and so I am not sure if the code above is the best way to do it. If you have any suggestions or feedback, please feel free to leave them in the comments section below.
ESP32 Code: Display Handling
The C++ code running on the ESP32 performs the following tasks:
- Sets up the TFT display.
- Sets up the web socket server/UDP receive port.
- Receives the image data from the Python script.
- Displays the image on the TFT display.
Websockets Bitmap Version
This is the main .ino file that has the code. It should be pretty self explanatory with the comments. The code is also available on the project GitHub page.
#pragma GCC push_options
#pragma GCC optimize ("O3") // O3 boosts fps by 20% ~speculation i kept for good luck :)
//For server communication
#include <WiFi.h>
#include <WebServer.h>
#include <ArduinoJson.h>
#include <WebSocketsServer.h>
#include <TFT_eSPI.h> // Graphics and font library for ST7735 driver chip
#include <SPI.h>
//This file has the Webpage
#include "index.h"
//Hmm not sure why this is needed
#include <string.h>
TFT_eSPI tft = TFT_eSPI();
void TFTSetup();
//Wifi credentials : Aim is to make a WiFiStation on ESP.
//These are used when we setup Soft AP mode WiFi
const char* ssidAP = "WindowsStreamer";
const char* passwordAP = "eightcharlong";
// WIFI IP: 192.168.160.20 //might need to change this
//these are my phone's wifi credentials not needed if they are commented
// These are used when we use Station mode WiFi
const char* ssid = "Nj";
const char* password = "r18nmbr4";
//Display Stuff
#define DISPLAY_BUFFER_SIZE 160 * 128
#define DISPLAY_WIDTH 160
#define DISPLAY_HEIGHT 128
#define StartX 0
#define StartY 0
#define FPSdesired 100 //Desired FPS for the display(max 30)
#define FPSDelayMS 1 / (FPSdesired * 1.0) * 1000 //The time we have to wait for between each new frame
uint16_t* DisplayBuffer;
uint8_t* DisplayPreBuffer;
void fillDisplayBuffer(uint8_t* payload, uint16_t length);
void fillDisplayPreBuffer(uint8_t* payload, size_t length);
bool DisplayBufferReady = false;
uint16_t Current_BUFFER_Pos = 0;
uint16_t fpscounter = 0;
unsigned long timestart = 0;
const int FPSDelay = ceil(FPSDelayMS); //The Delay in Milliseconds between each new frame.
uint32_t packet_time = 0;
unsigned long SessionStart = 0;
void DisplayConnectionInfo();
//For the Webserver stuff
#define soft_AP 0 //if this is 1 then the ESP will be a soft AP otherwise it will be a station
String jsonString; //String to hold the JSON data
WebServer server(80); //Webserver object
WebSocketsServer webSocket = WebSocketsServer(81); //Websocket object
//This function is called when a client connects to the websocket
void webSocketEvent(byte num, WStype_t type, uint8_t* payload, size_t length) {
//Serial.printf("WebSocket %d received event: %d\n", num, type);
switch (type) {
case WStype_DISCONNECTED:
Serial.printf("WebSocket %d disconnected\n", num);
Serial.printf("Session Time: %d sec\n", (micros() - SessionStart)/1000000);
SessionStart = micros();
//display the connection info
DisplayConnectionInfo();
break;
case WStype_CONNECTED:
{
IPAddress ip = webSocket.remoteIP(num);
Serial.printf("WebSocket %d connected from %d.%d.%d.%d url: %s\n", num, ip[0], ip[1], ip[2], ip[3], payload);
SessionStart = micros();
}
break;
case WStype_TEXT:
if (*payload == 49) {
packet_time = micros();
}
if (*payload == 48) {
Current_BUFFER_Pos = 0;
fillDisplayBuffer(DisplayPreBuffer, DISPLAY_BUFFER_SIZE * 2);
DisplayBufferReady = true;
//Serial.printf("Packet Built in %d us\n", micros() - packet_time);
}
break;
case WStype_BIN:
//Fill the received data into our DisplayBuffer
//but the data is 8bit, buffer is 16bit so we need to do some conversion
fillDisplayPreBuffer(payload, length);
break;
case WStype_ERROR:
Serial.printf("WebSocket %d error\n", num);
break;
case WStype_FRAGMENT:
Serial.printf("WebSocket %d fragment\n", num);
break;
default:
Serial.printf("WebSocket %d unknown type\n", num);
break;
}
}
//Setup function
void setup(void) {
//start serial communication
Serial.begin(115200);
while (!Serial)
delay(10);
//Allocate the display Buffers
DisplayPreBuffer = (uint8_t*)malloc(2 * DISPLAY_BUFFER_SIZE * sizeof(uint8_t));
DisplayBuffer = (uint16_t*)malloc(DISPLAY_BUFFER_SIZE * sizeof(uint16_t));
if (DisplayPreBuffer == NULL || DisplayBuffer == NULL) {
while (1)
Serial.println("Buffer Allocation Failed");
}
//connect to WiFi, check which connection type is wanted
if (soft_AP == 1) {
//Setup soft AP
WiFi.softAP(ssidAP, passwordAP);
IPAddress myIP = WiFi.softAPIP();
Serial.print("IP address: ");
Serial.println(myIP);
delay(5000);
} else {
//Setup Station
WiFi.begin(ssid, password);
while (WiFi.status() != WL_CONNECTED) {
delay(500);
Serial.print(".");
}
Serial.println("");
Serial.print("Connected to WiFi network with IP Address: ");
Serial.println(WiFi.localIP());
delay(5000);
}
//Setup the TFT Screen
TFTSetup();
// Start the server, when new client connects, we send the index.html page.
server.on("/", []() {
server.send(200, "text/html", index_html);
});
server.begin(); //intialize the server
webSocket.begin(); // intialze the websocket server
webSocket.onEvent(webSocketEvent); // on a WS event, call webSocketEvent
//Display the connection info
DisplayConnectionInfo();
Serial.println("Setup Done");
delay(2500);
timestart = micros();
}
void loop() {
// Handle all the server BS
server.handleClient(); // Listen for incoming clients
webSocket.loop(); // Listen for incoming websocket clients
//If the DisplayBuffer is ready then draw the buffer to the screen
if (DisplayBufferReady == true) {
//We have a new buffer to display so do it
tft.pushImage(StartX, StartY, DISPLAY_WIDTH, DISPLAY_HEIGHT, DisplayBuffer);
DisplayBufferReady = false;
fpscounter++;
if (fpscounter > 100) {
float timetaken = ((micros() * 1.0 - timestart * 1.0) / 1000000.0);
Serial.printf("Printed %d frames in %lf seconds, framerate: %lf\n", fpscounter, timetaken, (fpscounter * 1.0 / timetaken));
timestart = micros();
fpscounter = 0;
}
}
else{
//Serial.printf("Waiting for Packet!\n");
}
}
void TFTSetup() {
tft.init();
tft.setRotation(1);
tft.fillScreen(TFT_BLACK);
tft.setSwapBytes(true);
}
void fillDisplayPreBuffer(uint8_t* payload, size_t length) {
int j = Current_BUFFER_Pos;
for (int i = 0; i < length; i++) {
DisplayPreBuffer[j] = payload[i];
j++;
}
Current_BUFFER_Pos = j;
}
void fillDisplayBuffer(uint8_t* payload, uint16_t length) {
uint32_t timestart = micros();
int j = 0;
for (int i = 0; i < length - 1; i += 2) {
DisplayBuffer[j] = ((payload[i] << 8) | (payload[i + 1] & 0xff));
j++;
}
//Serial.printf("Time to copy Fill Display: %d\n", (micros() - timestart));
}
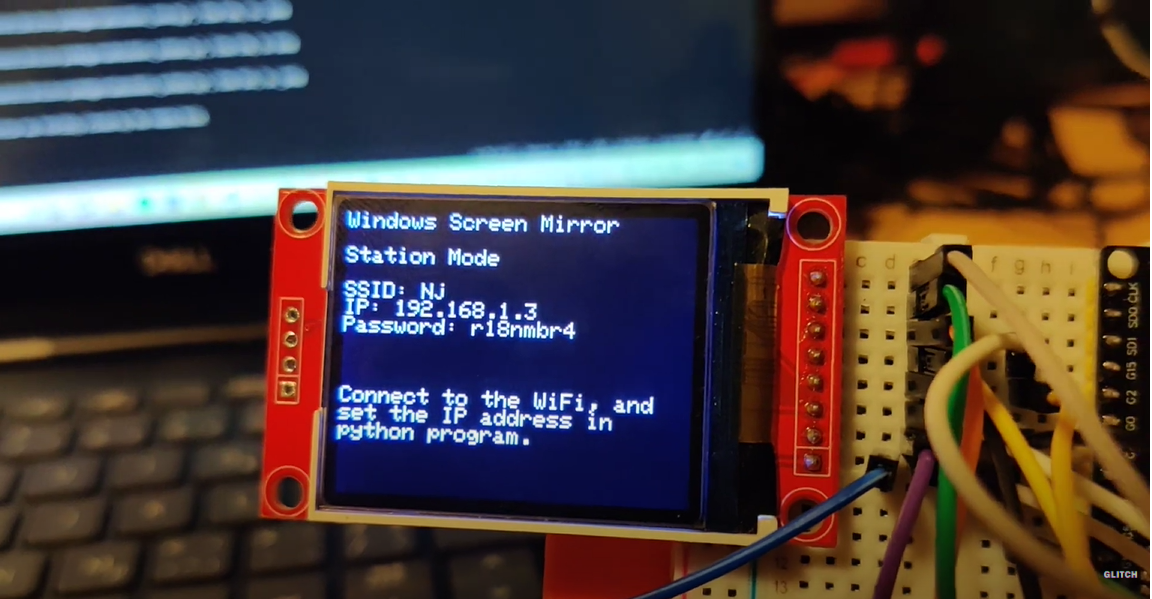
void DisplayConnectionInfo() {
//pirint the basic connection info like SSID, IP address and PAssword on the TFT
tft.fillScreen(TFT_BLACK);
tft.setCursor(0, 0);
tft.setTextColor(TFT_WHITE, TFT_BLACK);
tft.setTextSize(1);
tft.println("Windows Screen Mirror\n");
if (soft_AP == 1) {
tft.println("Soft AP Mode\n");
tft.println("SSID: " + String(ssidAP));
tft.println("IP: " + String(WiFi.softAPIP().toString()));
tft.println("Password: " + String(passwordAP));
} else {
tft.println("Station Mode\n");
tft.println("SSID: " + String(ssid));
tft.println("IP: " + String(WiFi.localIP().toString()));
tft.println("Password: " + String(password));
}
tft.println("\n\n");
tft.println("Connect to the WiFi, and ");
tft.println("set the IP address in");
tft.println("python program.");
}
#pragma GCC pop_options
For the other two approaches, the code structure is similar. In JPEG approach, we use the JPEGDecoder library to decode the JPEG image and then display it on the TFT. In the UDP approach, we use the WiFiUDP library to receive the data and then display it on the TFT. The code for these two approaches is also available on the project GitHub page.
YouTube Video
You can find the YouTube video for this project embedded below or click here to view it directly.
Conclusions + Future Work
- I tested all three approaches and the bitmap version is the best. Transmission through that has the least loss or missed frames, depending on the wifi traffic, the framerate dropped to 4-5FPS but only for a few seconds, then went back up. But the only problem there is the size of data sent. 168x120x2 bytes takes a while to send (70-80ms) and that puts the FPS at 12-15.
- The JPEG version was the second best, I was able to reduce file size to 2000 bytes and that was sent in 20-30ms. But the problem there was the JPEG decoding on ESP, it took 50-60ms to decode the image and that put the FPS at 12-15. So the FPS was the same as the bitmap version but the image quality was not as good.
- The UDP version was the worst. Since there is no guarantee that the data will be received, there were a lot of missed packets and the tranmisison was faster but the stream quality was worst thus I discarded it.
- In future I would like to use c++ to send the data from my computer as I believe it might be faster than python.